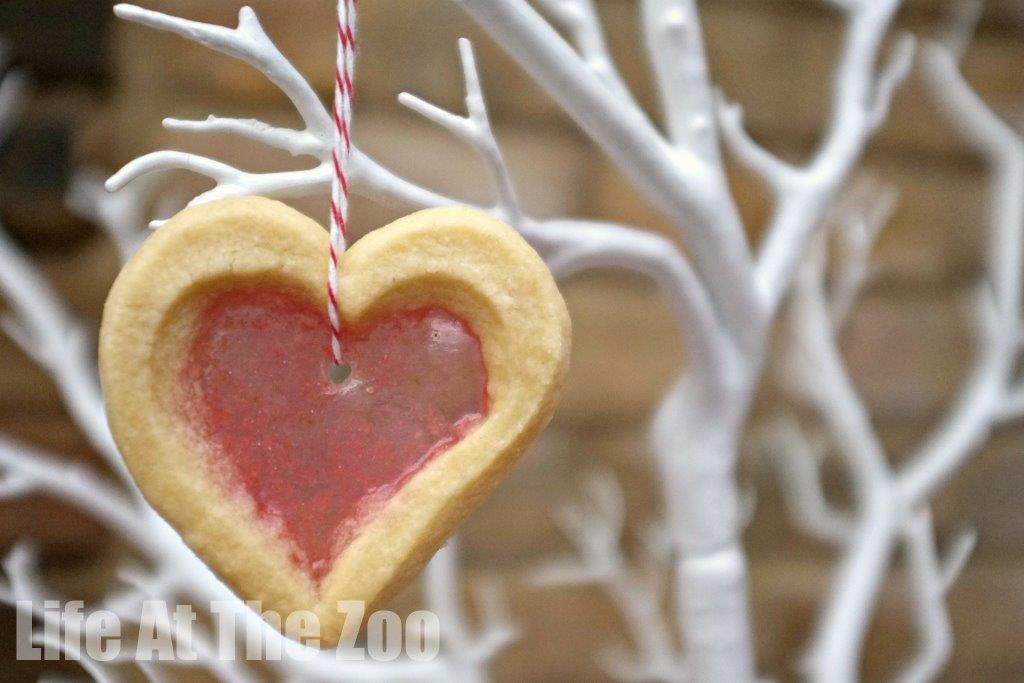
Stained Glass Cookie Recipe
Well.. some of you may know, that I have a 31 Days of Love series over on Red Ted Art. Every day two fellow bloggers share a Valentines/ Love Craft or activity with my readers. This week we are looking at Valentine’s Treats. And what better treat is there than the Stained Glass Cookie (we have a fantastic set of Edible Christmas Ornaments to browse too)?! We simply HAD to have a go. It is something that has been on my to do list FOREVER!
I had heard taht they are “tricky” to get right. So, I wanted to have a go and give you some “Top Tips” for success. Nothing worse than seeing pretty pictures on Pinterest and your attempt not looking the same. I also wanted to see if our family (egg free) cookie recipe would work for these too.. and they did Hooray.
The Family Cookie Recipe:
- 300g Plain Flour (2.5cups)
- 200g Butter (1.75 sticks of butter) – at room temperature
- 100g Sugar (0.5 cups)
You will also need some boiled (red) sweets. We used some Lollipops left over from our Superhero Party.
Heart Cookier cutters in two sizes. If you only have one size, that is ok too, as you can use a knife to cut out the second heart (I did this and it worked fine).
How to Make Stained Glass Cookies – Method:
1) Mix your ingredients.
2) Leave in fridge for 10min or so.
TOP TIP: DO refridgerate your dough. If you refridgerate it first, it holds it shape better and it will get less “mixed up” with the melting sweets.
3) Roll out. And cut your first heart shape. Place on the baking tray. THEN cut out the second heart. Once you have your “cookie frame” like this, you don’t want to be moving it again.
TOP TIP: Cut the holes out of your cookie once on the baking tray
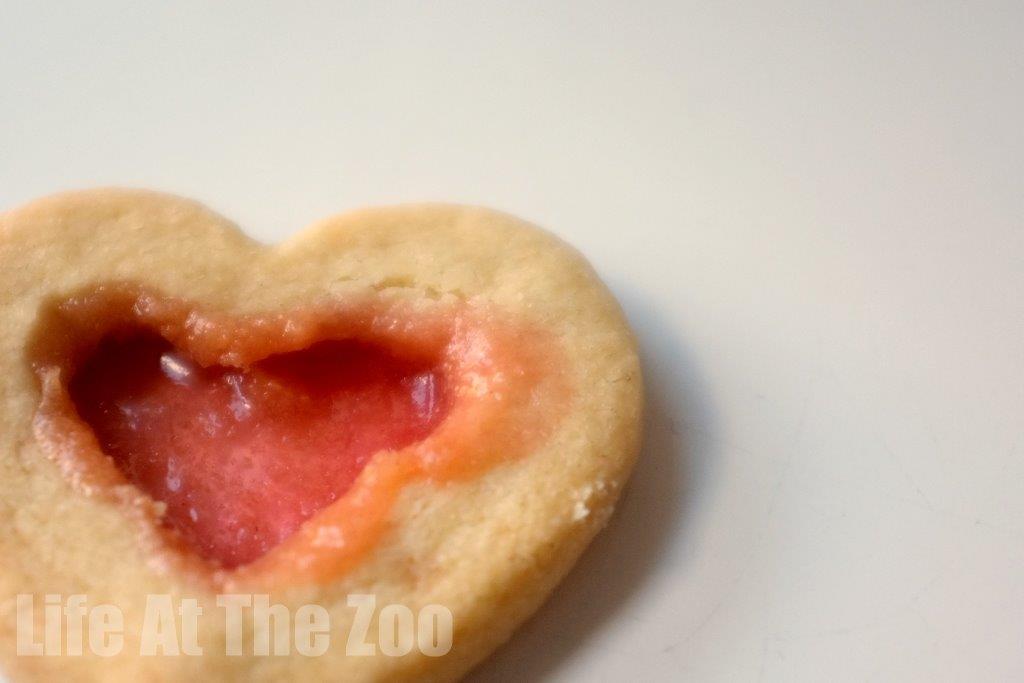
“Failed” cookie – the hole was a little too small, I didn’t refridgerate the dough AND I overfilled the centre.
TOP TIP: Do NOT make your “hole” too small…. this is likely to cause the melted sweet to later bubble over and make the edges messy. THE classic “pinterest fail” for these cookies.
4) Bash your boiled sweets into smaller pieces. This actually dented my roll pin. And sprinkle inside your shape.
TOP TIP: cover your sweets with a clean cloth as they will go flying EVERYWHERE.
TOP TIP: Make a big sweet pile in the middle of your cookie.. don’t worry about getting it all the way to the edges.. it will melt and fit into your cookie by itself. If you try and fit it in all the nooks and grannies, you MAY have the sugar bubble up and go over the edge of the cookie and that looks messy.
4) Bake for 10-15min at 170-180C
TOP TIP: It is better to remove them a little too early, than too late. As soon as you see the cookie brown, remove. This will prevent the boiled sweet to melt and then OVERHEAT. If you overheat the melted sweet it could start going brown.
5) Once removed from the oven use a skewer to make a hole for hanging. You may have to waite a minute or two for the sugar to begin to set. Don’t wait TOO long or else the sugar goes too hard.
6) Let cool on the paper on a rack.
FINAL TOP TIP: remember to actually turn the oven on.. hahahaha. Yep, I forgot to do that. Doh.


Oh these are very cute! We will have to give them a go!
becky recently posted..The ChillFactor Ice Cream Maker